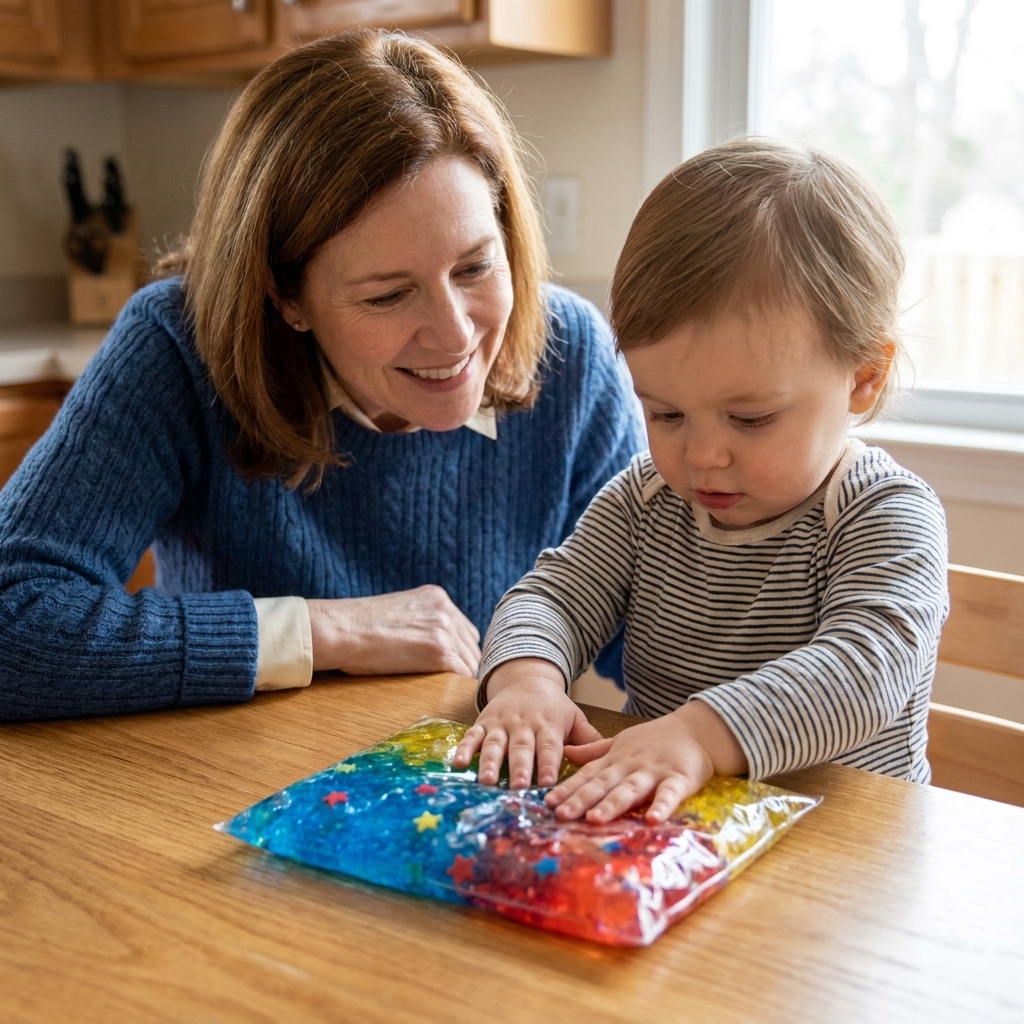
Keep tiny hands busy without the cleanup. Try these 15 simple sensory bag activities for ages 1-3, plus safety tips, play prompts, and easy ways to switch th...
If my house had a motto, it would be: “Contained mess is still a win.” Sensory bags are my favorite shortcut to hands-on play when the kids are climbing the walls, I need five minutes to make dinner, or I simply cannot face glitter on the couch again.
These activities use sealed zip-top bags with hair gel, paint, and little toys for squishy, tactile fun without the cleanup. They are toddler-friendly (with supervision), engaging for preschoolers, and surprisingly satisfying for early elementary kids too.
Safety first
- Use freezer bags. They are thicker and less leaky than sandwich bags.
- Double-bag it. Put your filled bag inside a second bag, especially if you are using paint or lots of add-ins.
- Press out extra air. Less air means less stress on the seams when kids squish with enthusiasm.
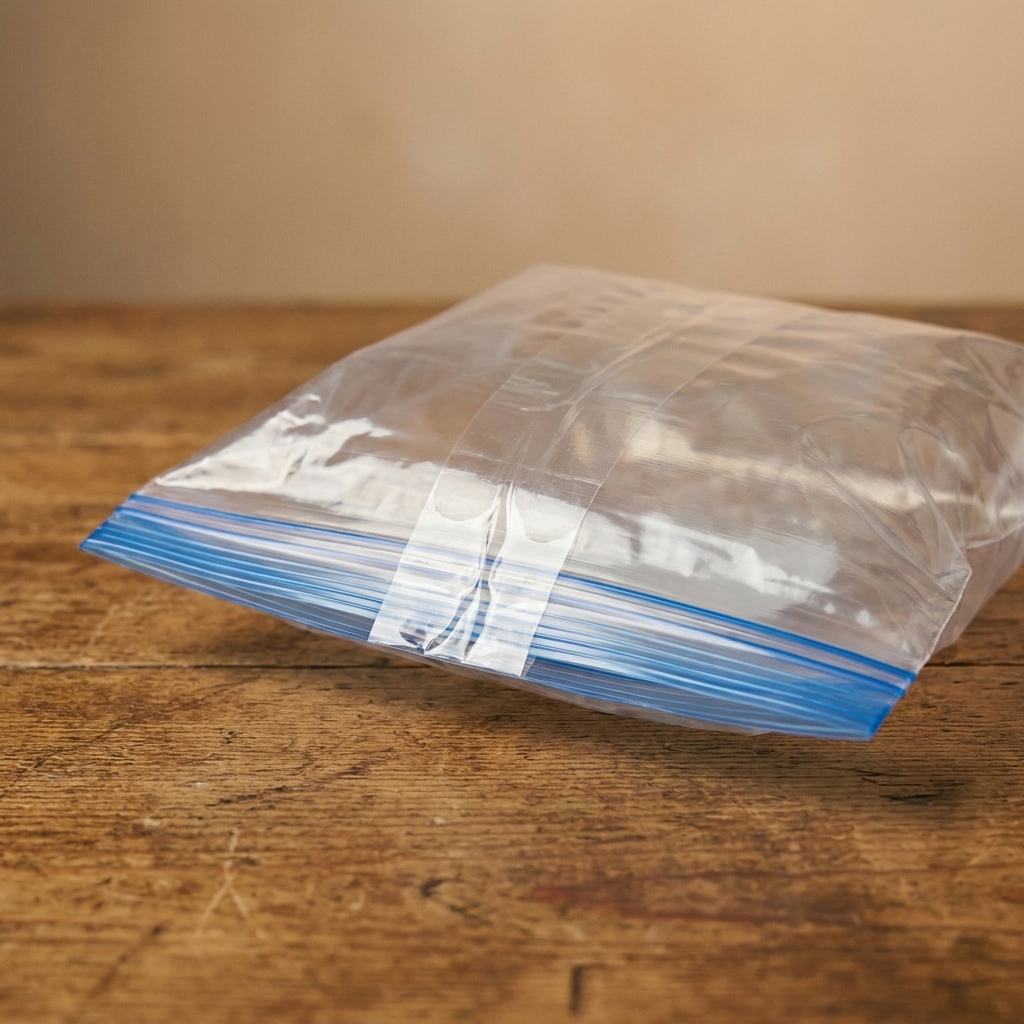
- Tape the seal. Use packing tape or strong clear tape over the zipper edge. Washi tape is cute, but this is one place I reach for the serious tape.
- Always supervise. Sensory bags are not chew toys. If your little one is in the “I taste everything” phase, keep it as a lap activity with you right there. If your child bites or pokes bags, skip this activity and try a sensory bin with safer materials instead.
- Avoid choking hazards. Even “bigger” sequins or beads can be a problem if a bag fails. For toddlers, stick with add-ins that would not be dangerous if spilled (think large foam shapes or chunky pom-poms).
- Watch sensitivities. Some hair gels are fragranced or dyed and can irritate sensitive skin. If that is your house, choose fragrance-free gel and wash hands after play.
- Use a tray when possible. It is not required, but a baking sheet makes carrying and storing easier.
What you need
You do not need a craft closet for these. Here is my basic sensory bag kit:
- Zip-top freezer bags (they are thicker and less leaky than sandwich bags)
- Clear hair gel (cheap is fine)
- Washable tempera paint or washable paint labeled washable (skip regular acrylic, which can stain once dry)
- Optional: dish soap (can slightly thin gel and help bubbles settle after resting)
- Small add-ins (pom-poms, buttons, foam stickers, sequins, googly eyes, toy cars, plastic animals)
- Tape
- Cookie sheet or tray (optional)
Gel-to-add-ins ratio: For most bags, 1 to 2 cups of hair gel plus a small handful of add-ins is the sweet spot. Too many add-ins makes it bulky and harder to squish.
If you want a hair gel alternative: Clear aloe gel or clear shampoo can work in a pinch. They tend to be runnier than hair gel, so start with smaller amounts and double-bag.
10 sensory bag activities
For every bag: Fill, press out extra air, seal, then tape across the zipper (and double-bag if you want extra peace of mind).
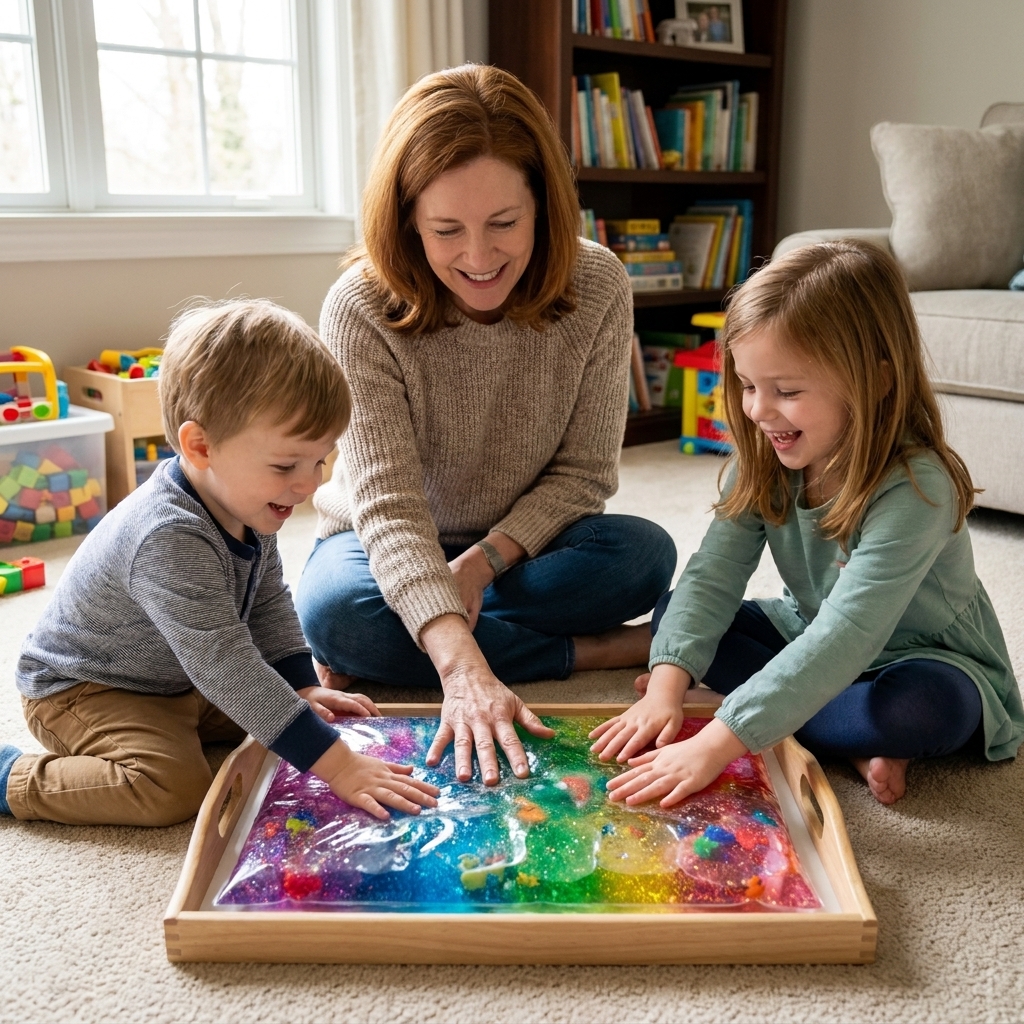
1) Rainbow squish bag
Best for: ages 2 to 8
Fill it with: hair gel + a few drops of washable paint in 3 to 5 colors
How to make it:
- Add 1 to 2 cups hair gel to a freezer bag.
- Add small dots of paint in different colors (do not mix yet).
- Let kids press and swirl to make color trails.
Play prompt: “Can you make a rainbow path from one corner to the other?”
2) Alphabet hunt bag
Best for: ages 3 to 7
Fill it with: hair gel + foam alphabet stickers or foam letters
How to make it:
- Add gel to the bag.
- Drop in 10 to 20 foam letters.
- Seal and tape.
Ways to play: Call out a letter to find, spell a short name, or hunt for all the vowels.
3) Shape tracing bag
Best for: ages 3 to 6
Fill it with: hair gel + a tiny swirl of paint or glitter glue (optional)
How to make it:
- Fill the bag with gel (add a small swirl of color if you want more contrast).
- Tape the bag flat to a table or window.
- Give your child a finger, cotton swab, or the blunt end of a paintbrush to trace shapes on the bag’s surface.
Bonus: Slide a printed shape sheet underneath the bag and trace right over it.
4) Dino rescue bag
Best for: ages 3 to 8
Fill it with: hair gel + mini plastic dinosaurs + green washable paint
How to make it:
- Add 1 to 2 cups gel.
- Add 1 to 2 teaspoons green paint (start small; you can always add more next time).
- Add 3 to 6 mini dinos.
- Seal and tape. Squish to “free” the dinosaurs from the swamp.
Play prompt: “Can you push the T-rex to the volcano corner?”
5) Car track bag
Best for: ages 2 to 7
Fill it with: washable paint + a little hair gel (for smoother sliding)
How to make it:
- Add 2 to 4 tablespoons washable paint and 1 to 2 tablespoons hair gel.
- Seal and tape, then press the paint around to make a thin layer.
- On the outside of the bag, roll a small toy car across and watch “tracks” appear as the paint moves.
Troubleshooting tip: If it feels too thick, add a tiny squirt of dish soap next time, then let it rest flat so bubbles can settle.
6) Ocean calm bag
Best for: ages 3 to 8 (also soothing for grown-ups)
Fill it with: hair gel + blue paint + small ocean toys (fish, shells) or blue pom-poms
How to make it:
- Mix gel with a few drops of blue paint (or just do swirls).
- Add a couple of ocean items.
- Seal, tape, and slowly press to make “waves.”
Use it for: quiet time, waiting rooms, or that pre-dinner meltdown window.
7) Construction dig bag
Best for: ages 3 to 8
Fill it with: hair gel + a small pinch of kinetic sand (optional) + mini construction vehicles
How to make it:
- Add gel to the bag.
- If using kinetic sand, add 1 to 2 teaspoons max for texture. Too much can clump and put more stress on the seams.
- Add 2 to 4 mini trucks (avoid sharp edges or pointy pieces).
- Seal and tape. Kids push the vehicles through the “mud” to build roads.
Note: Skip the sand for toddlers and for any kid who is hard on bags.
8) Color sort bag
Best for: ages 2 to 6
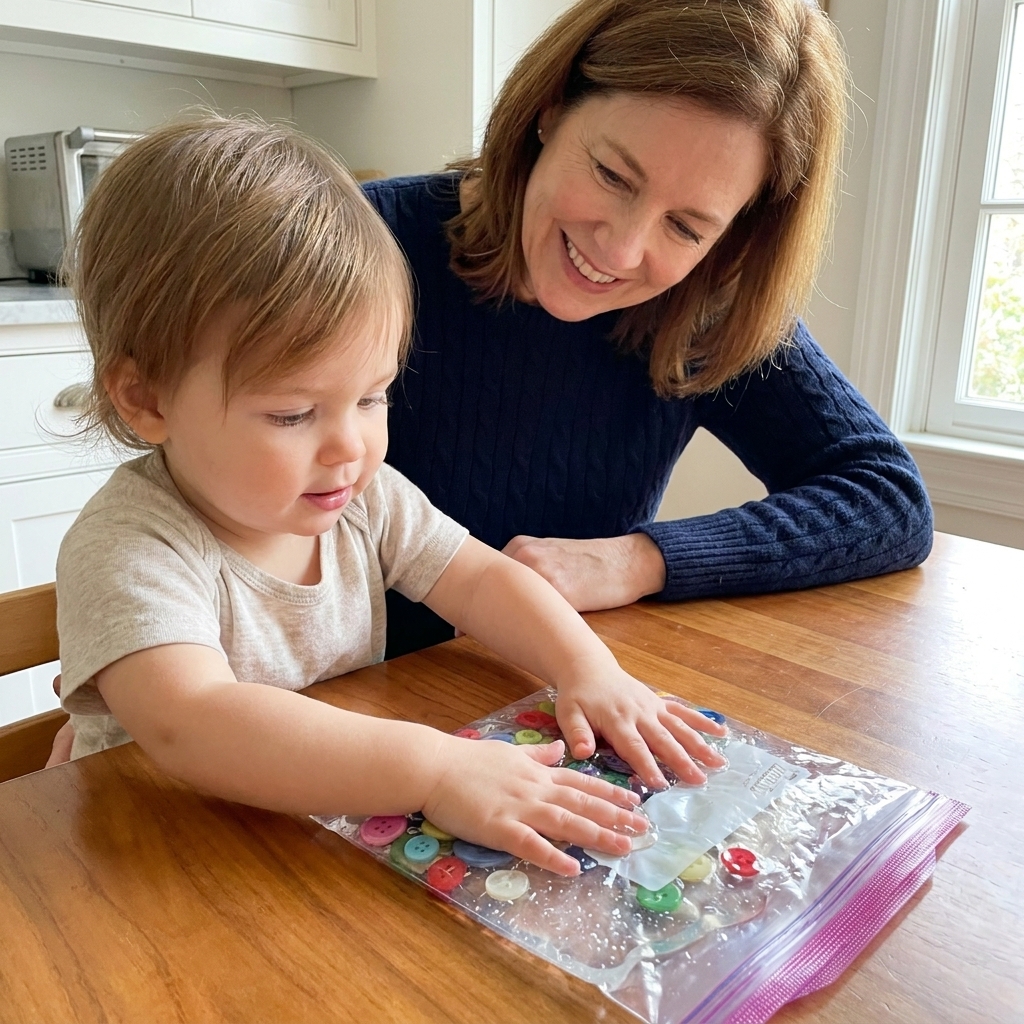
Fill it with: hair gel + large colorful buttons and pom-poms
How to make it:
- Add gel and a handful of large buttons and pom-poms.
- Seal and tape.
Ways to play: “Find all the red ones,” “Group the blues together,” or “Make a line from smallest to biggest.”
9) Seasonal confetti bag
Best for: ages 2 to 8
Fill it with: hair gel + seasonal confetti or foam shapes
How to make it:
- Add gel to the bag.
- Add a small handful of seasonal pieces (pumpkins, snowflakes, hearts, stars).
- Seal and tape.
My favorite use: Put it in a “busy basket” for holiday meals when grown-ups need a little uninterrupted chatting.
10) I-Spy mini toy bag
Best for: ages 4 to 8
Fill it with: hair gel + themed objects (sized for your child) + a pinch of sequins or glitter confetti for visual “camouflage”
How to make it:
- Add gel to the bag.
- Add 10 to 15 themed items (mini erasers, plastic gems, chunky beads, bugs).
- Add a tiny pinch of sequins or glitter confetti to make it trickier.
- Seal and tape.
Ways to play: Call out an item to find, time each round, or take turns being the “I-Spy caller.”
Make them last
- Store flat. Slide them into a large zip-top bag or a folder bin so they do not get poked.
- Keep them cool. Heat can thin gel and make tape peel faster. A closet shelf beats a sunny windowsill.
- Wipe clean. A damp cloth removes smudges. Avoid soaking the taped seal.
- Retape as needed. If the zipper area starts to look stressed, add a fresh strip of packing tape across the top.
If it leaks
- Contain it fast. Pick up the bag by the taped edge and set it in a bowl or on a tray.
- Wipe, then wash. Paper towels first, then warm soapy water for any residue.
- Skip the drain dump. Large amounts of gel can be annoyingly cloggy. Scrape what you can into the trash, then wash the rest away with plenty of water.
Quick troubleshooting
- Too many air bubbles: Let the bag sit flat for an hour so bubbles can rise and settle. If you want, add a tiny squirt of dish soap next time and rest it before play.
- Paint is staining the bag: Stick with washable tempera paint and use small amounts. A little goes a long way.
- The bag is sliding around: Tape all four edges to the surface, or place it on a silicone baking mat.
- My child wants more challenge: Add a mission: spell 3 words, sort by color, rescue all animals to one corner, make patterns.
FAQ
What is the best filler for a sensory bag?
Clear hair gel is my go-to because it is thick, slow-moving, and cheap. For a thinner feel, mix in a small squirt of dish soap or try clear shampoo or aloe gel (both can be runnier). For a more paint-like look, add a few tablespoons of washable paint.
Can toddlers use sensory bags?
Yes, with close supervision and sturdy sealing. Use freezer bags, double-bag, and stick with add-ins that would not be dangerous if spilled. If your toddler bites or punctures bags, skip sensory bags for now.
How do you keep sensory bags from leaking?
Use freezer bags, press out extra air, seal carefully, then tape over the zipper. For peace of mind, put it inside a second bag and tape again.
How long do sensory bags last?
It depends on your gel, add-ins, heat, and how hard your kids go with the squishing. Some last a few days, others last weeks, and a well-sealed bag can last longer if stored flat and cool. If you notice cloudiness, a smell, or a weakening seam, toss it and remake it.
Your turn
If you try one of these, start with the rainbow squish bag or the I-Spy bag. They are the biggest wow for the least effort, which is basically my whole parenting brand. And if your house is also held together by hot glue and washi tape, you are in excellent company.